
Equipment buying guide
Mini Crawler Dumper Buying Guide: Payload, Access and Tipping
A mini crawler dumper can fit through the entrance and still be awkward to use at the other end. A tight corner, a raised receiving bin or nowhere to turn may decide which configuration you need.
Start with one complete trip: where the material is loaded, how it reaches the work area and where it is tipped. This guide helps you put those details into an enquiry before comparing model specifications.
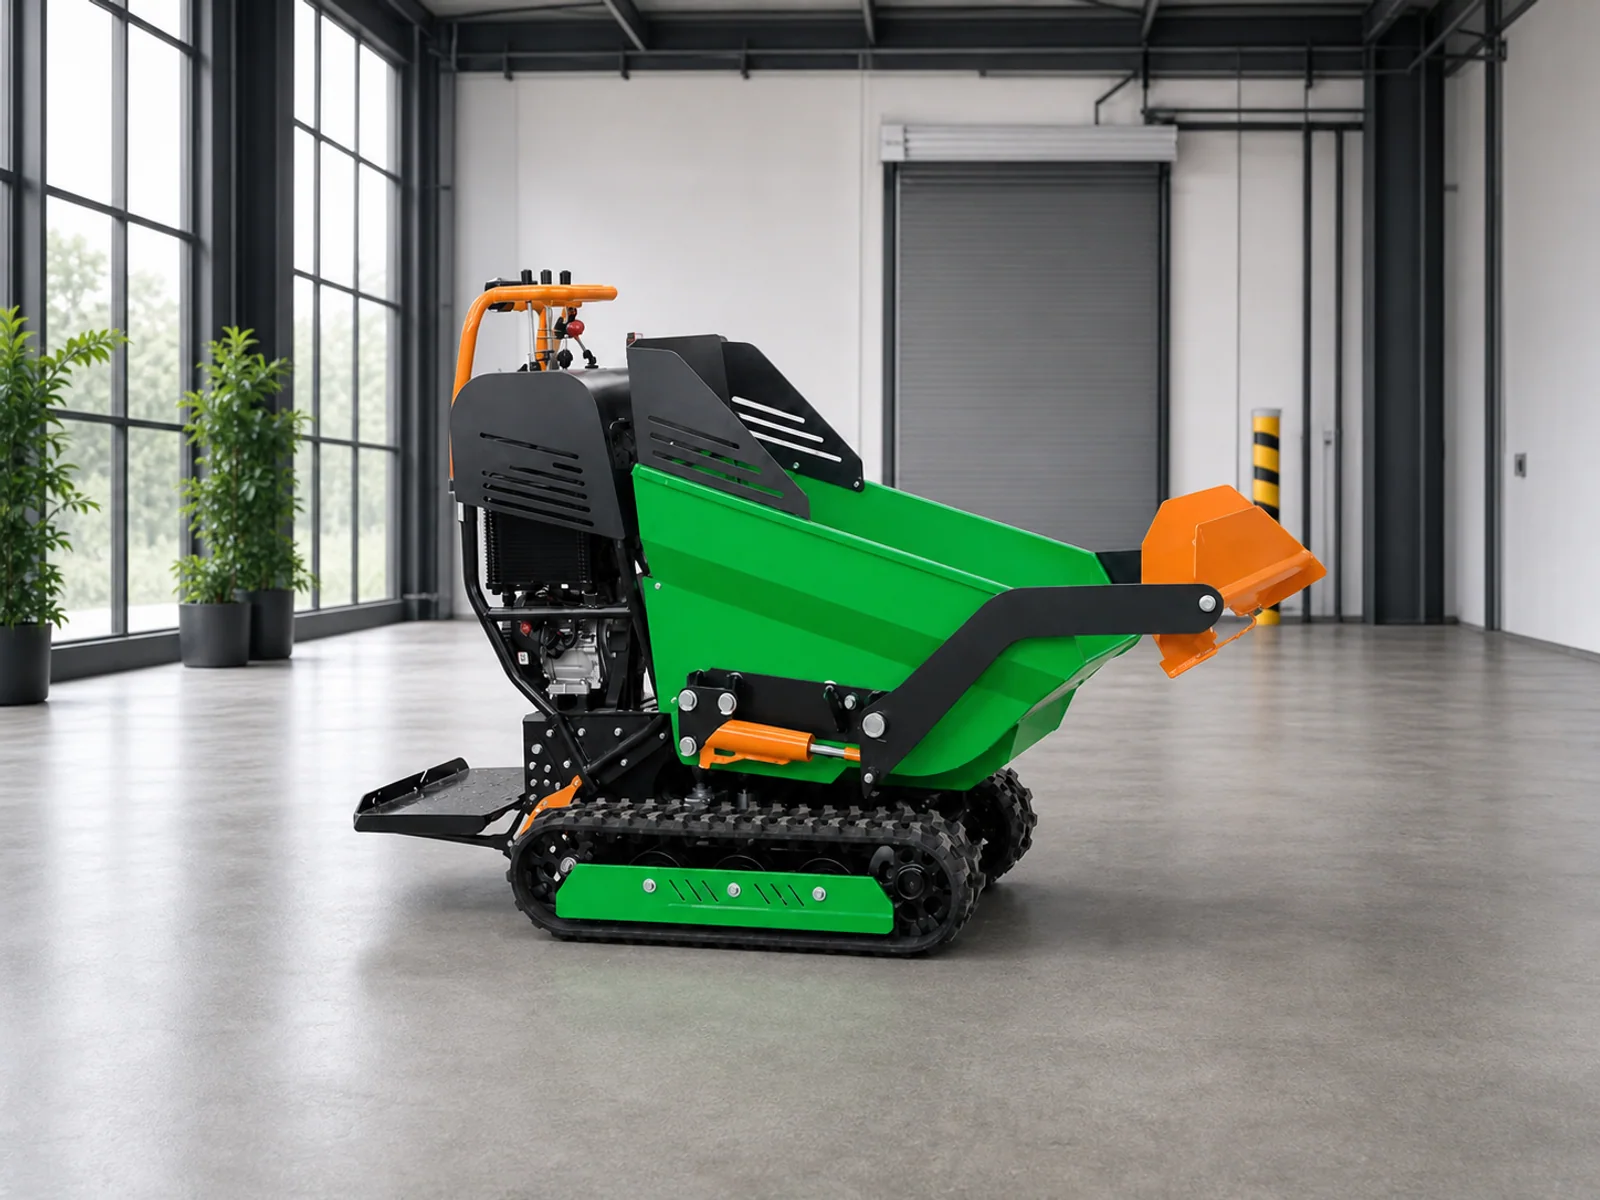
Describe the job and the load
Write down what the machine will move and how it will be loaded. Loose soil from a loader, bagged supplies and broken concrete create different questions about the hopper, loading arrangement and load distribution. A photograph of a normal batch is useful alongside the material description.
Check which loading equipment is included in the quoted configuration. Some dumpers have self-loading equipment; others rely on a separate loader or manual loading. If the job also needs powered tools for digging, sweeping or drilling, compare the attachment requirements on the mini skid steer page.
- Payload: the mass carried
- Record the expected load per trip in kg, including packaging where relevant. Say whether it was weighed or estimated and how the estimate was made.
- Hopper capacity: the space available
- Ask whether the quoted volume is struck or heaped and how it is defined. A hopper volume in litres or m³ does not establish the permitted load in kg.
Moisture, lump size and how material settles can change the mass in a given volume. Ask the supplier to assess your actual material and loading method against the specified machine. Do not calculate an operating load from a nominal hopper volume alone.
An enquiry note with the unknowns left visible
“Material: damp excavated soil. Loading: site loader. Batch mass: not yet weighed; we will send a measured batch weight. Hopper volume basis: to confirm with the supplier.” This gives the supplier useful context without turning an estimate into a load rating.
Measure the route beyond the narrowest gate
Measure the entrance at its narrowest usable point, including hinges, posts and other projections. Then follow the route to the unloading point. Mark the corners and the space available to change direction. A straight-line width check does not describe a turn.
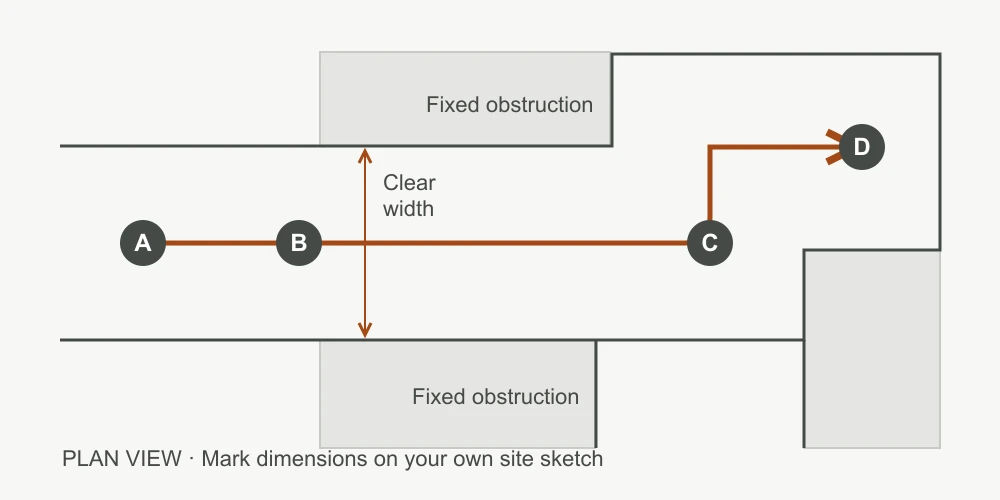
- A · Loading area
- Record how the load enters the hopper.
- B · Restricted passage
- Measure the clear opening, including projections.
- C · Change of direction
- Show the approach widths and surrounding space.
- D · Receiving point
- Include the unloading approach and empty return.
The line connects the locations to survey. It is not a machine turning path or a clearance approval.
| Location | Information for the supplier |
|---|---|
| Loading area | Loading method, available approach space, overhead restrictions and where people or other equipment need access. |
| Gate or passage | Measured clear width and height, projections and any change in width along the passage. |
| Corner or turning area | A plan with both approach widths and the space around the corner. Include obstructions that cannot be moved. |
| Travel surface | Surface type, soft or uneven areas, drainage and changes in gradient. Show these on the same route plan. |
| Receiving point and return | Receiver position, unloading approach and the route back after tipping. Identify any need to reverse. |
Ask for the overall dimensions of the exact configuration being offered, including controls, platforms and fitted loading equipment. The supplier needs to compare that configuration with your route; track width by itself leaves out parts of the machine.
Match the tipping arrangement to the receiving point
Unloading onto the ground and unloading into a container need different checks. For a container, send its opening dimensions and position, the height of its near edge, and the space available for the machine to approach. Identify the ground level from which the height was measured.
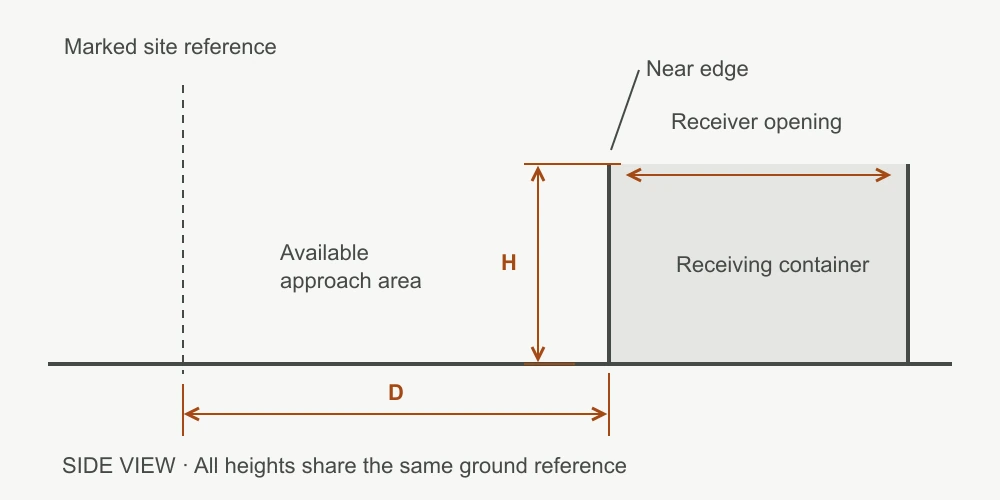
- H · Receiver height
- Measure the near edge above the surface on which the machine will stand.
- D · Horizontal position
- Locate the near edge relative to a fixed point marked on your site plan.
The site reference locates the receiver; it is not a prescribed safe setback. The supplier still needs to check the proposed machine’s discharge path and full movement envelope.
Ask for a dimensioned drawing showing the discharge point through the tipping movement and the full clearance envelope of the hopper and any lifting mechanism. Compare it with the receiver opening, near edge and nearby structures. A quoted lift height alone does not establish that the material will clear the edge and land inside.
Keep the approach and empty return on the drawing. If access requires a particular tipping direction, state it in the enquiry and have the supplier identify the proposed mechanism. Do not assume front tipping, high tipping or swivel tipping is included from a model name or photograph.
Have the working conditions checked for the exact machine
Send photographs of the route in its normal working condition, including wet or soft areas if these occur. Mark uphill and downhill sections, cross-slopes and changes of surface. Include the expected load and whether the route changes during the project.
A published climbing or gradeability figure is not permission to travel or tip on that slope. Loaded travel, turning and unloading need separate consideration against the exact model’s operating instructions. Ask for those instructions before purchase, and have a competent person assess the site and proposed use.
Also state where the machine will be used and charged or fuelled, as applicable. Power supply, ventilation, noise restrictions and the working shift can affect the proposed power unit. This buying checklist is not an operating procedure or a substitute for training.
Keep the model and configuration together
ROCKVANTA’s current supplier records include ELY2.0 and EH3.0 in the manufacturer-confirmed equipment sheet, and ELT500FD separately in the ELT brochure. These are separate references. Do not combine a payload from one record with dimensions or a tipping arrangement from another.
When reviewing a quotation, keep the model reference, configuration, drawing revision and operating information together. Ask the supplier to resolve missing units or unclear specification labels in writing. An undefined engine figure is not enough to compare power units.
A quotation gap worth catching
Suppose the drawing shows a standard hopper, but the quotation describes a raised tipping arrangement. Ask for the drawing and dimensions of the offered assembly before using them to check your receiving bin. The two documents need to describe the same machine.
For the equipment enquiry and available reference information, see mini crawler dumpers. Include the destination country so the supplier can identify the documentation required for that configuration and market. Do not treat a brochure logo as proof of compliance.
Send the load details with a route sketch
Attach a simple plan, photographs of the tightest access points and the receiving-point dimensions. Add the material, expected load per trip, loading method, working conditions and quantity required. Mark anything you have not measured as “to confirm”.
Keep the measurements with the enquiry
The plain-text checklist follows the load, route and receiving-point checks above. You can fill it in with any text editor or paste the relevant parts into an email.
Download dumper site checklist (TXT)Ask the supplier to return the proposed model and configuration, the dimensions used for the access and tipping checks, and any unresolved questions. Keep that reply with the quotation so later changes to the hopper, controls or loading equipment are checked against the same site information.
The enquiry form requires only your company, contact name and email. Add the site details to the message or an attachment when available; you do not need to complete the whole checklist to make an enquiry.